Programming with Strip Chart Controls
This topic describes how to complete the following tasks programmatically.
- Associating a trace with a specific y-axis
- Binding to a DataSocket source
- Creating a strip chart
- Customizing axis labels
- Customizing the appearance of the axes names
- Customizing the strip chart legend
- Customizing the strip chart legend context menu
- Customizing strip chart traces
- Deleting data from a strip chart
- Displaying data on a strip chart
- Displaying the strip chart legend
- Optimizing performance
- Pausing plotting on the strip chart
- Specifying dates and times for axis values
- Specifying the display format of axes
- Specifying how data displays
- Specifying how the strip chart scales
- Specifying the active y-axis
- Specifying which axes are visible
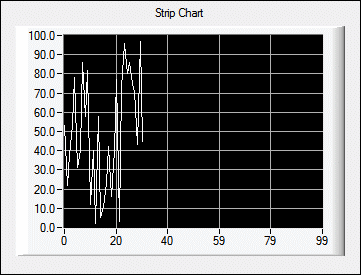
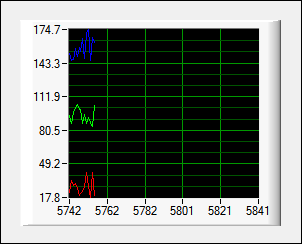
Creating a Strip Chart
Use NewCtrl to create a strip chart control.
int strChart;
strChart = NewCtrl (panelHandle, CTRL_STRIP_CHART_LS, "Strip Chart", 25, 15);
Displaying Data on a Strip Chart
Call PlotStripChartPoint to plot one point.
int timer, randomNum;
timer = NewCtrl (panelHandle, CTRL_TIMER, "", 0, 0);
InstallCtrlCallback (panelHandle, timer, PlotData, 0);
. . .
int CVICALLBACK PlotData (int panelHandle, int controlID, int event, void *callbackData, int eventData1, int eventData2)
{
switch (event) {
case EVENT_TIMER_TICK:
randomNum = rand()*100.0/(double)RAND_MAX;
PlotStripChartPoint (panelHandle, strChart, randomNum);
break;
}
return 0;
}
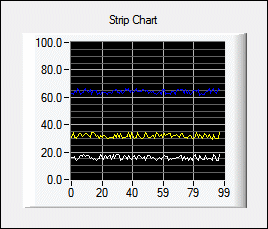
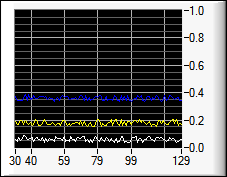
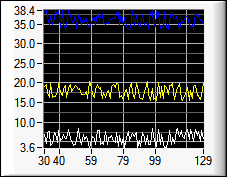
Call PlotStripChart to plot one or more points to each trace. If the strip chart is visible, drawing takes place immediately, without the need to process events. The strip chart can contain up to 512 traces. When you use the PlotStripChart function to add data to the strip chart, the data points you pass to PlotStripChart are evenly appended to each trace in the strip chart.
double points[3];
SetCtrlAttribute (panelHandle, PANEL_STRIPCHART, ATTR_NUM_TRACES, 3);
points[0] = 16 + 5 * ((rand() / (double)RAND_MAX) - 0.5);
points[1] = 32 + 5 * ((rand() / (double)RAND_MAX) - 0.5);
points[2] = 64 + 5 * ((rand() / (double)RAND_MAX) - 0.5);
PlotStripChart (panelHandle, PANEL_STRIPCHART, points, 3, 0, 0, VAL_DOUBLE);
Deleting Data from a Strip Chart
ClearStripChart (panelHandle, PANEL_STRIPCHART);
Specifying How Data Displays
Specify one of the following scroll modes for the strip chart:
- Sweep mode—Allow new data to overwrite old data as it wraps past the right and starts over on the left.
SetCtrlAttribute (panelHandle, PANEL_STRIPCHART, ATTR_SCROLL_MODE, VAL_SWEEP);
You can customize the sweep line that appears in this mode with the ATTR_SWEEP_LINE_COLOR attribute.
- Continuous mode—Scroll data off the left edge of the plot area as new data appears on the right. This is the default scroll mode for the strip chart.
SetCtrlAttribute (panelHandle, PANEL_STRIPCHART, ATTR_SCROLL_MODE, VAL_CONTINUOUS);
- Block mode—Erase the entire plot when the data reaches the right edge.
SetCtrlAttribute (panelHandle, PANEL_STRIPCHART, ATTR_SCROLL_MODE, VAL_BLOCK);
Specifying How the Strip Chart Scales
You can specify the scaling mode and range of the y-axis only. However, you cannot specify or obtain these values for the x-axis.
/* Specify the minimum and maximum range of the y-axis. */
SetAxisScalingMode (panelHandle, PANEL_STRIPCHART, VAL_RIGHT_YAXIS, VAL_MANUAL, 10.0, 70.0);
/* Specify that the strip chart should autoscale. */
SetAxisScalingMode (panelHandle, PANEL_STRIPCHART, VAL_LEFT_YAXIS, VAL_AUTOSCALE, 0.0, 0.0);
/* Specify that the strip chart should use minimum and maximum values based on previously plotted data. */
SetAxisScalingMode (panelHandle, PANEL_STRIPCHART, VAL_LEFT_YAXIS, VAL_LOCK, 0, 0);
Call GetAxisScalingMode to obtain the current range and scaling mode of the y-axis of a strip chart control.
You can get and set the x offset and x increment for a strip chart. The following example shows how to set these values.
SetCtrlAttribute (panelHandle, strChart, ATTR_XAXIS_GAIN, 5.0);
SetCtrlAttribute (panelHandle, strChart, ATTR_XAXIS_OFFSET, 1.0);
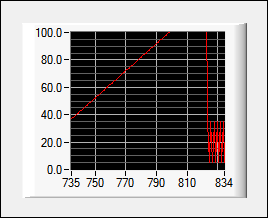
Pausing Plotting on the Strip Chart
When you pause plotting, LabWindows/CVI displays a scroll bar on the strip chart, which you can use to view previously plotted data.
SetCtrlAttribute (panelHandle, PANEL_STRIPCHART, ATTR_SCROLL_MODE, VAL_CONTINUOUS);
SetCtrlAttribute (panelHandle, PANEL_STRIPCHART, ATTR_STRIP_CHART_PAUSED, 1);
/* Specify how many points are available to view when you pause plotting. */
SetCtrlAttribute (panelHandle, PANEL_STRIPCHART, ATTR_HISTORY_BUFFER_SIZE, 500);
Associating a Trace with a Specific Y-Axis
You can change the axis with which a trace is associated:
SetTraceAttributeEx (panelHandle, strChart, 1, ATTR_TRACE_YAXIS, VAL_RIGHT_YAXIS);
Customizing Strip Chart Traces
You can customize individual traces by setting attributes for a given trace using SetTraceAttribute and SetTraceAttributeEx. Refer to traces through their one-based index.
 |
Note You must use SetTraceAttributeEx to set ATTR_TRACE_LG_FONT and ATTR_TRACE_LG_TEXT. |
SetTraceAttributeEx (panelHandle, strChart, 1, ATTR_LINE_STYLE, VAL_DOT);
SetTraceAttributeEx (panelHandle, strChart, 1, ATTR_TRACE_COLOR, VAL_MAGENTA);
SetTraceAttributeEx (panelHandle, PANEL_STRIPCHART, 1, ATTR_TRACE_LG_TEXT, "Device 1");
SetTraceAttributeEx (panelHandle, PANEL_STRIPCHART, 2, ATTR_TRACE_LG_TEXT, "Device 2");
SetTraceAttributeEx (panelHandle, PANEL_STRIPCHART, 3, ATTR_TRACE_LG_TEXT, "Device 3");

Specifying Which Axes Are Visible
A strip chart contains one x-axis and two y-axes. By default, the left y-axis is visible. The following code makes the right y-axis visible:
SetCtrlAttribute (panelHandle, PANEL_STRIPCHART, ATTR_ACTIVE_YAXIS, VAL_RIGHT_YAXIS);
SetCtrlAttribute (panelHandle, PANEL_STRIPCHART, ATTR_YLABEL_VISIBLE, 1);
Specifying the Active Y-Axis
ATTR_ACTIVE_YAXIS determines which of the y-axes is used for the following actions:
- Adding a trace to the strip chart by setting ATTR_NUM_TRACES—The trace is associated with the active y-axis.
- Setting an axis attribute—Each axis has its own attribute values.
- Setting the axis range—Each axis has its own range.
Specifying the Display Format of Axes
Use the ATTR_XFORMAT and ATTR_YFORMAT attributes to specify the display format of the x-axis and y-axis values.
SetCtrlAttribute (panelHandle, strChart, ATTR_XFORMAT, VAL_ENGINEERING_FORMAT);
Specifying Dates and Times for Axis Values
To display date/time data, set the display format.
// Set absolute time.
SetCtrlAttribute (panelHandle, strChart, ATTR_XFORMAT, VAL_ABSOLUTE_TIME_FORMAT);
SetAxisTimeFormat (panelHandle, strChart, VAL_BOTTOM_XAXIS, VAL_ABSOLUTE_TIME_FORMAT, "%X %B %#d, %Y");
If you use the absolute time format, LabWindows/CVI expects that you plot data that contains the number of seconds since January 1, 1900. This format is compatible with the format the timetime and GetCurrentDateTime functions use.
// Set relative time.
SetCtrlAttribute (panelHandle, strChart, ATTR_XFORMAT, VAL_RELATIVE_TIME_FORMAT);
SetAxisTimeFormat (panelHandle, strChart, VAL_BOTTOM_XAXIS, VAL_RELATIVE_TIME_FORMAT, "%#M:%S.%3f");
If you use the relative time format, LabWindows/CVI expects that you plot data that contains the number of seconds since some arbitrary point in time, commonly denoted as t0. For example, you might use the start of a data acquisition process as the arbitrary point in time.
Formatting Dates and Times
Call SetAxisTimeFormat to change the format string that specifies how the date/time is displayed on the specified axis. The format string can contain the specifiersspecifiers that the ANSI C strftime function supports. You also can use an additional specifier, %nf, which represents the fractional part of the seconds, and the @ modifier, which restricts overflow for certain time units.
When the axes are in absolute time or relative time format, the value you specify for ATTR_XAXIS_OFFSET or ATTR_YAXIS_OFFSET is the t0 value. The value you specify for ATTR_XAXIS_GAIN or ATTR_YAXIS_GAIN is the Δt value. Call MakeDateTime or GetCurrentDateTime to obtain time values you can use as ATTR_XAXIS_OFFSET and ATTR_YAXIS_OFFSET values. You also can pass time values to the SetAxisScalingMode min and max parameters when you configure an axis for manual scaling.
Customizing Axis Labels
/* Replace the numeric labels of strip chart axes with custom text labels */
SetCtrlAttribute (panelHandle, PANEL_STRIPCHART, ATTR_YUSE_LABEL_STRINGS, 1);
InsertAxisItem (panelHandle, PANEL_STRIPCHART, VAL_LEFT_YAXIS, -1, "Low", 0.0);
InsertAxisItem (panelHandle, PANEL_STRIPCHART, VAL_LEFT_YAXIS, -1, "Ideal", 20.0);
InsertAxisItem (panelHandle, PANEL_STRIPCHART, VAL_LEFT_YAXIS, -1, "High", 60.0);
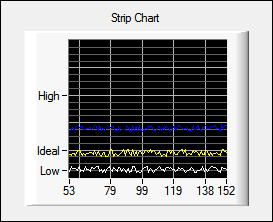
Use functions such as GetAxisItem, ReplaceAxisItem, and DeleteAxisItem to manipulate these label/value pairs.
Each individual string appears only when the value it is associated with falls within the range of the axis.
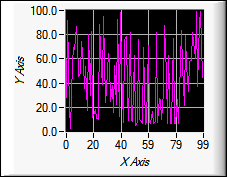
Customizing the Appearance of the Axes Names
You can customize the appearance of the x- and y-axis names using the ATTR_XY ... attributes.
SetCtrlAttribute (panelHandle, strChart, ATTR_XNAME, "X Axis");
SetCtrlAttribute (panelHandle, strChart, ATTR_YNAME, "Y Axis");
SetCtrlAttribute (panelHandle, strChart, ATTR_XYNAME_ITALIC, 1);
Displaying the Strip Chart Legend
The strip chart legend displays traces from the strip chart. By default, the legend does not appear for strip chart controls.
SetCtrlAttribute (panelHandle, strChart, ATTR_LEGEND_VISIBLE, 1);
Customizing the Strip Chart Legend
By default, the strip chart legend displays only the first trace. Call SetTraceAttribute to specify other traces to display in the legend.
int i, numTraces;
GetCtrlAttribute (panelHandle, PANEL_STRIPCHART, ATTR_NUM_TRACES, &numTraces);
for (i=1; i <=numTraces; i++)
SetTraceAttribute (panelHandle, PANEL_STRIPCHART, i, ATTR_TRACE_LG_VISIBLE, 1);

Specify labels for traces in the legend using the following function:
SetTraceAttributeEx (panelHandle, PANEL_STRIPCHART, 1, ATTR_TRACE_LG_TEXT, "Device 1");
SetTraceAttributeEx (panelHandle, PANEL_STRIPCHART, 2, ATTR_TRACE_LG_TEXT, "Device 2");
SetTraceAttributeEx (panelHandle, PANEL_STRIPCHART, 3, ATTR_TRACE_LG_TEXT, "Device 3");
When you delete a trace from the strip chart, LabWindows/CVI also removes it from the legend.
By default, the legend sizes itself automatically whenever you add or remove a new item.
// Specify the size of the strip chart legend.
SetCtrlAttribute (panelHandle, strChart, ATTR_LEGEND_AUTO_SIZE, 0);
SetCtrlAttribute (panelHandle, strChart, ATTR_LEGEND_TOP, VAL_BOTTOM_ANCHOR);
SetCtrlAttribute (panelHandle, strChart, ATTR_LEGEND_HEIGHT, 45);
The strip chart legend includes a context menu that gives users the ability to edit trace attributes at run time.
SetCtrlAttribute (panelHandle, PANEL_STRIPCHART, ATTR_LEGEND_INTERACTIVE, 1);
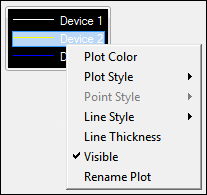
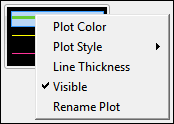
Customizing the Strip Chart Legend Context Menu
// Add and remove built-in items from the context menu.
HideBuiltInCtrlMenuItem (panelHandle, PANEL_STRIPCHART, VAL_PLOT_POINT_STYLE);
HideBuiltInCtrlMenuItem (panelHandle, PANEL_STRIPCHART, VAL_PLOT_LINE_STYLE);
// Add your own items to the context menu.
void CVICALLBACK CustomMenu (int panelHandle, int controlID, int MenuItemID, void *callbackData);
. . .
NewCtrlMenuItem (panelHandle, PANEL_STRIPCHART, "Delete Trace", -1, CustomMenu, 0);
. . .
/* This custom context menu item makes the selected trace invisible. */
void CVICALLBACK CustomMenu (int panelHandle, int controlID, int MenuItemID, void *callbackData)
{
int activeItem;
GetActiveLegendItem (panelHandle, PANEL_STRIPCHART, &activeItem);
SetTraceAttribute (panelHandle, PANEL_STRIPCHART, activeItem, ATTR_TRACE_VISIBLE, 0);
}
You also can use control menu attributes to configure context menus. Call GetCtrlMenuAttribute and SetCtrlMenuAttribute to get and set these attributes.
Optimizing Performance
Anti-Aliasing
Anti-aliasing causes plots to draw more smoothly, but the plotting speed is significantly slower. By default, strip charts do not draw anti-aliased plots. To enable anti-aliasing, use the following function:
SetCtrlAttribute (panelHandle, strChart, ATTR_ENABLE_ANTI_ALIASING, 1);
Autoscaling
When you enable autoscaling, LabWindows/CVI recalculates the limits of the y-axes and remaps the existing strip chart traces on every update. As the number of existing traces on a strip chart increases, try to minimize scaling adjustments because the time necessary to recalculate and remap all the existing traces increases. You can minimize delays by disabling autoscaling, thereby preventing the recalculation and remapping of the strip chart traces.
|
Note Autoscaling is not available for the x-axis. |
Binding to a DataSocket source
(Linux) Data binding is not supported.
Controls can have only one DataSocket connection. You must specify whether the access mode is READ mode or WRITE mode:
- READ mode—The control gets data from the DataSocket source. LabWindows/CVI appends new data to existing traces in strip chart controls. In READ mode, the trace(s) on the strip chart control updates automatically when the value changes at the source.
- WRITE mode—The control transfers data to the DataSocket source. In WRITE mode, the value at the DataSocket source updates automatically when the value of the strip chart control changes.
You must enable the DataSocket option in the Edit Installer dialog box Drivers & ComponentsDrivers & Components tab if your applications use data binding.
Binding to a DataSocket Source in the User Interface Editor
Complete the following steps to bind a network variable to a strip chart control.
- In the Edit Strip Chart dialog box, click the DataSocket Binding button.
- Click the browse button to the right of the Server text box in the DataSocket Binding dialog box.
- Select the network variable you want to bind and click the OK button.
- Select whether you want to read or write data in the Connection Type option.
- Click the OK button.
Binding to a DataSocket Source Programmatically
Use DSBindCtrl to bind a strip chart control to a DataSocket source. Data is sent to and received from the DataSocket source as a 1D array of data that is split among the traces on the chart.
Use DSUnbind to disconnect the strip chart control from the DataSocket source.