Edit Package Dialog Box - Advanced Tab
Use the Advanced tab of the Edit Package dialog box to specify advanced options for the package distribution.
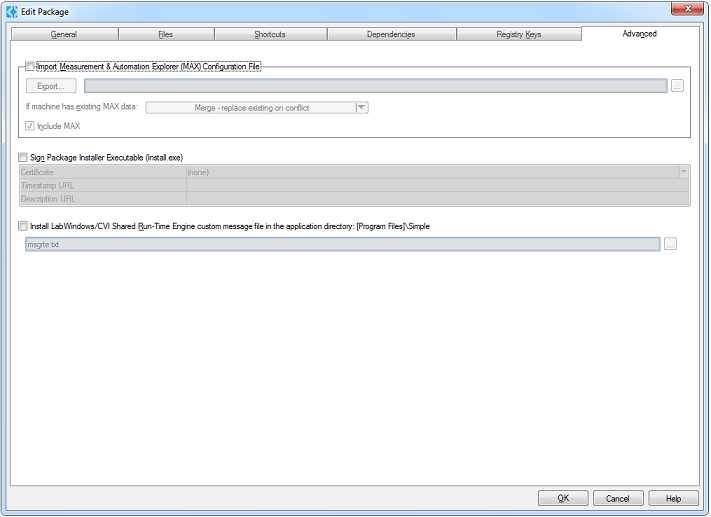
The Advanced tab provides the following options:
- Import Measurement & Automation Explorer Configuration File—Enable this option to provide the path to an NI Measurement and Automation Explorer (MAX) hardware configuration file and have the file imported as part of the installation. If a reboot is needed after installation, the configuration import is scheduled to run after the computer reboots.
If the installer includes an NI device driver for recently installed hardware on the target computer, the user must complete the Windows Add Hardware Wizard before importing the MAX settings.
If the import process is cancelled or fails, the user can manually import the new configuration file once the problem is corrected.
If you enable the Import Measurement & Automation Explorer Configuration File option, you can specify the following additional options:- Merge - replace existing on conflict—If the MAX import process encounters a naming conflict between an existing item and a new item, the new item overwrites the existing item.
- Merge - preserve existing on conflict—If the MAX import process encounters a naming conflict between an existing item and a new item, the existing item is preserved.
- Replace existing configuration data—Any existing configuration settings are discarded and are replaced by the new configuration. If the import process fails to complete successfully, you can manually import the new configuration file once the problem is corrected. To restart the import process, select File»Import from within MAX.
- Include MAX—If enabled, the distribution automatically includes MAX and any additional MAX support products required to import the hardware configuration in the installer, if they are present on the build computer.
Disable this option only if you know that the target computer has the software required to import the hardware configuration installed already and you want to keep the package as small as possible.
- Sign Package Installer Executable (Install.exe)—Enable this option to sign the package installer you create with the Edit Package dialog box. Signing Install.exe is a separate step from signing your executable or DLL.
- Certificate—Select a signing certificate to use to sign your installer. This list displays certificates that are installed in the My certificate store. LabWindows/CVI supports signing only with certificates installed in the My certificate store.
You also can have a certificate as a file, but the file does not appear in this field. You must import the certificate from the file into the My certificate store so that LabWindows/CVI can locate it. - Timestamp URL—Specify a timestamp that ensures that the digital signature was valid at the time it was issued.
This option is helpful because signing certificates expire. If your certificate expires, Windows cannot validate the certificate, and the software might not install or run. With a timestamp, you can ensure that the digital signature is still valid, even if your certificate expires. - Description URL—Specify a URL that appears when your users right-click Install.exe and look at the digital signature. For example, you can specify your company URL.
- Certificate—Select a signing certificate to use to sign your installer. This list displays certificates that are installed in the My certificate store. LabWindows/CVI supports signing only with certificates installed in the My certificate store.
- Install custom Runtime message file—Specifies a custom runtime message file to install to the application directory specified in the Files tab. The message file applies only to the application for which you are building the distribution and does not upgrade the existing runtime message file.
You can use this option to install a translated message file.